1. Turn off the Pinabar main switch on the backside of machine and unplug.
2. Open the front door.
3. Carefully remove the following parts slowly and treat the blades with care to not damage the sharp edges.
CAUTION: VERY SHARP BLADES! CUT-SAFE GLOVES RECOMMENDED.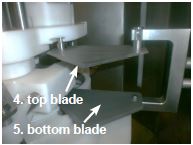
4. Grab the blade from the back and pull the top blade counter-clockwise to remove.
CAUTION: VERY SHARP BLADES! CUT-SAFE GLOVES RECOMMENDED.
5. Turn the bottom blade counter-clockwise to remove.
CAUTION: VERY SHARP BLADES! CUT-SAFE GLOVES RECOMMENDED.
6. Remove the rosette blade from the cutout in the connecting unit. Pay attention to positioning and sharp side up. Be sure to lift blade up, by pressing it from the bottom. Then remove it.
CAUTION: VERY SHARP BLADES! CUT-SAFE GLOVES RECOMMENDED.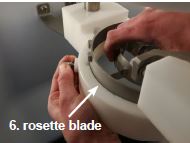
7. Remove the safety pin.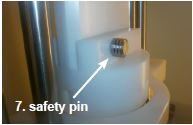
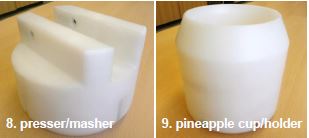
8. Remove the presser/masher from the machine.
9. Lift the cup/holder from the machine.
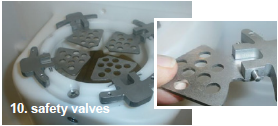
10. Lift up safety valves to remove from the machine.
11. Empty the waste bin.
12. Clean the machine with warm water and soap.
13. Removable parts can also be placed in dishwasher.
14. Place the parts back into the machine in reverse order:
a. Place part 10, the safety valves back.
b. Place part 8, the presser/masher back and attach with the safety pin (part 7) to the press unit.
c. Place part 6, the rosette blade into the cutout of the connecting beam. Pay close attention to positioning and sharp side-up.
d. Place part 5, the bottom blade back. Place it in the cutout of the connecting beam. When placed, press the blade to lock it in correctly.
e. Place part 4, the top blade back. Place it in the cutout of the connecting beam. When placed, press the blade to lock it in correctly. The top blade is marked with an inscription “mes boven”
15. Plug the machine in and turn on the main switch in back. Close the door and position the machine back to its starting position.
16. Press flashing red button to “home” the machine allowing it to perform one full cycle and prepare it for use.
Cleaning Instructions
Have more questions? Submit a request
Please sign in to leave a comment.
0 Comments